At the moment I am texturing/learning how to texture the P51 Mustange Model that I made. I've been using projections and 3D textures in maya to add detail to the model such as decals, checker pattern, and stripes. These projections have then been baked onto the fuslage's UVs and baked out as a tiff texture that I can then open up in photoshop and layer on top of each other. Then it becomes a case of using what ever tools I feel comfortable using to delete all but the neccessary areas of each texture until only the bits I want are layered on top of each other. This is how I have made the basic diffuse colour texture for the model. I also kept seperate the texture I made of the planes panel detail so I could use it as a bump map. Now that I have finished the colour texture, and once I am satisfied and have finished tweaking it at this stage, I will once again re open it in Photoshop to start distressing the texture and adding life like detail. I will also open up UV snap shots of the planes detailing and paint details onto them before returning back to Maya to apply the diffuse and bump textures. Then the final step will be to use those existing textures to make a specular map for the different components of the plane. Then the texturing will be finished.
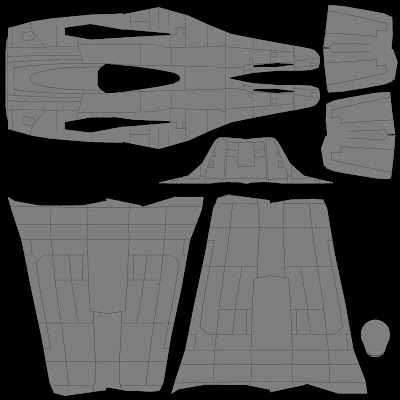
Here is the detail image I made in photoshop, this adds panel definition to the model and is also used as a bump map to add depth in the cracks in between metal panels.
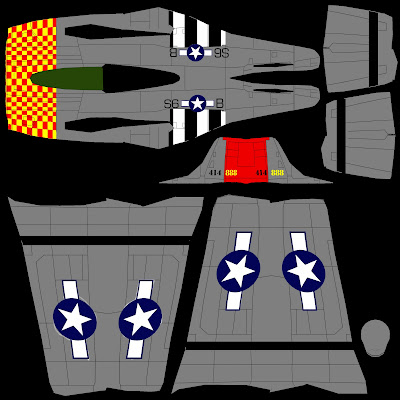
Here is the colour map for the mustang prior to any texture distressing. I'll post a quick render of the fuselage with the maps applied.
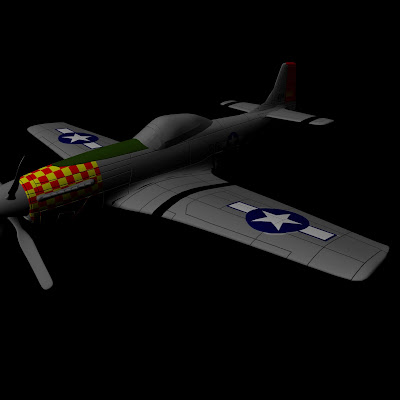
Final Render of the Mustang with a smooth on the model and with bump and colour maps applied. There is a slight problem with the texture where the wing joins the body when the smooth is applied but this will be one of the areas I will need to work into when I go back into photoshop to start distressing the texture.


No comments:
Post a Comment