
Friday, March 26, 2010
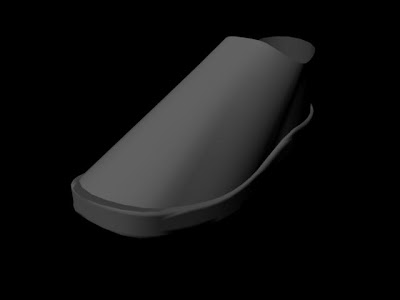
Nurbs Sandle
So I'm venturing further and further into the world of non rational b-splines, and started to model a show bout 28 minutes ago. All was going swimmingly (here is a render if you dont believe me) but Maya decided to help my learning curve by randomly changing the scale and angle of my image reference, luckily I noticed something was up before continuing however I dont yet not how to rectify it so ill probly spend the rest of the evening wrestling with the problem. Anyhow onto how I made the start of my sandle. First I created a nurbs circle and repositioned CVs to match reference image, then duplicated the curve to make the top of the sandle base. I scaled two more duplications in so I could loft the base of the sandle. after that it was just a case of duplicating the curve and offsetting it a bit and using a further duplication to make the angle. I then lofted between these two surfaces. The next step will be to adjust the shape of the foot, then make nurbs curves to use to trim sections out, when it will start to look sandle like. Finally add a few details and its done.
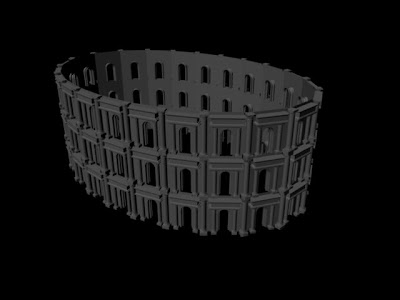
Finished Nurbs Collosseum
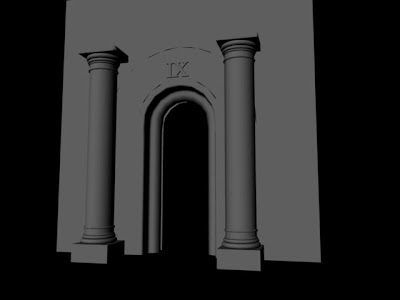
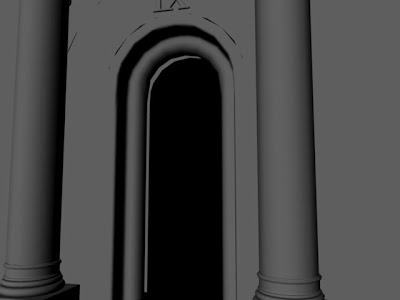
Here are some renders of what I shall dub my finished Nurbs Collosseum, I think I will be going back into it and adjusting it in the future but this is a demonstration of the finished article. The beaty of the way it was modeled is due to many saves and also the way in which the collosseum is constructed means that I would go back in and make adjustments to the original archway model (add more detail, smooth out or remodel sections) and then just use that to animation sweep to make the base layer and re-duplicate the layer to create the finished collosseum. That way of working has been a definate plus in this modeling exercise.


Thursday, March 25, 2010
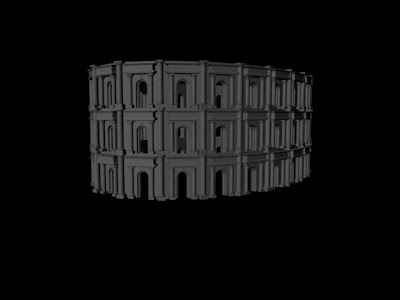
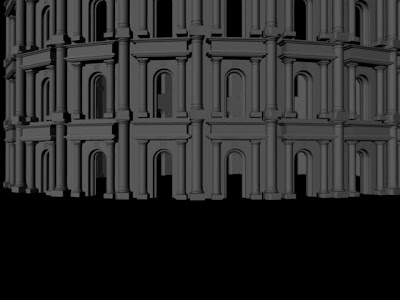
NURBS Collosseum
I've been getting back into my cgi work and have started learning quite a bit about modeling with nurbs. At the moment i am modeling a collosseum (although the renders I am posting my not just yet ressemble one). As it stands I have currently sculpted two pillars, and archway (from the archway I have lofted the wall section). I have also been spending some time making some detail for the inside of the arch, however Ive hit a bit of a brick wall with the birail tool and for some reason that neither I nor google can work out it is refusing to work. Just sitting around randomly changing settings wasnt getting anywhere so I decided to continue modeling,if the tool starts working or I find another way to make the effect I am after (I think using the animate sweep tool might well do it) then the detailing will be added. Also I need to got throught and match up some curves as shown up in the renders by the black gaps. Anyhow back to work.


Saturday, March 20, 2010
They Call Me Trinity
Here it is folks, the finshed piece (we attempted to keep it off the great interweb until after assessment on monday, but hell we just wanted to show people). It has taken a group of four hard working animators 5 weeks to get to this point. For those who are interested we split our time up into; one week planning (storyboards, animatics, character/ armature designs, set designs, ideas for lighting, how we were going tell the story etc), one week building (armatures, sets, props), roughly two weeks animating and finally roughly one week compiling and editing (assembling in IMovie, editing frame by frame in photoshop, assembling sound track) and thats how we got here. Spread the video around any feedback would be good, ive got til monday to prepare my assessment presentation so if people mention good ways of improving it that I havent thought of I'm going to use them.
They Call Me Trinity Test Videos
As with all animation (since our first term this has become somewhat engrained) its been incredibly important to test animations (check movement, characeters, props, lighting, everything basically). here are a series of test videos that we shot whilst filming They Call Me Trinity. We learnt a lot of lessons whilst filming, giving us a massive case of "if i were to do it again syndrome". All These tests were from scenes that I was animating or one of the animators on. In each scene we cycled animators, the set up was usually 2 animators, one person manning the camera and one person providing crit/ direction or a multitude of very usual roles (holder upper, back up animator, fetcher of tea (joke!))
Wednesday, March 17, 2010
UV Maps
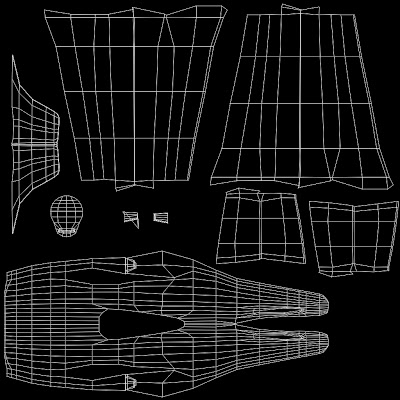
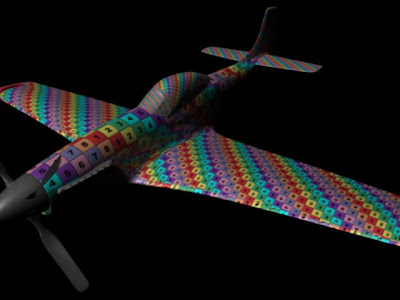
Here are the 2D texture maps from the P51 mustang, one map is for the fuselage, wings, and tail plane. The other map is for cock pit, nose cone, engine outlets and other extras. The only issue creating these textures is getting the hang of laying them out in the best way so that they remain in scale with one another, but also are as big as you can get them, without overlaps. Its really just a case of practise but I'm quite pleased, even if there is the odd internal face here and there thats been mapped. I've had some issues with the cockpit map though, for some reason only one section of mapping will appear at a time, so I will have to go back and investigate some.

UV Mapping
I ve spent the day unwrapping and sorting out the mess that was the UV's for my P51 Mustang (well I say mess, seeing as its a hard object rather than organic that UVs were actually in rather a good shape, once I had unwrapped them). I've learned a lot, how to use a lot of the tools in UV mapping on hard modelled objects, such as cutting, unfold, planar and cylindrical mapping, and possibly a few more I forgot to mention. I do still have a few bits left to do, uv mapping the extras (nose cone, props and engine exhausts) but those should be finished fairly soon, thens its just a case of laying out the UVs and putting them into photoshop so I can make a 2d texture to reapply that will fit the model perfectly. Preferably one with bump, specular and diffuse maps to make it look nice an realistic. Thats hopefully all to come.

Tuesday, March 16, 2010
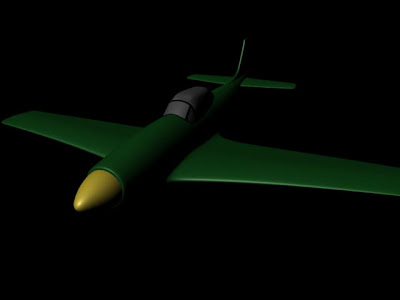
Finished 'Stang
So my little task of modeling a P51 Mustang has came to an end. There is probably a few odd verticies I could play around with fix up a bit if I feel like spending a little bit more time on this task. But overall I'm really pleased with how this has worked out. All I've done to the finished model is apply a series of blinns to give the impression or an idea of what the model would start to look like if I textured it properly (ie with the transparent glass etc). In the upcoming weeks I would really like to texture map the plane fully.


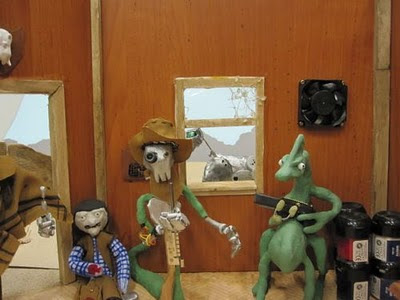
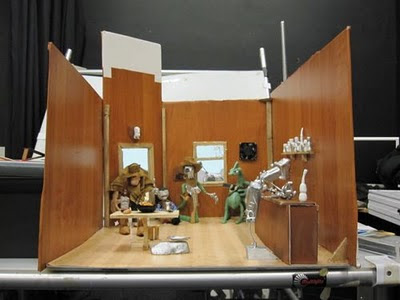
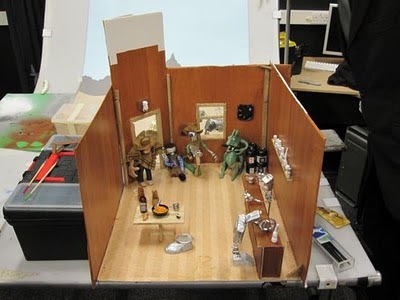
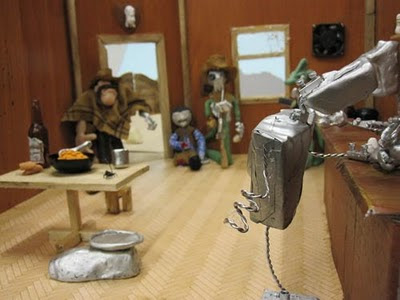
Behind the Scenes/Making of
Here are a collection of photos taken while we were filming our animation, hopefully they will give an insight into how the "magic" was made.


Monday, March 15, 2010
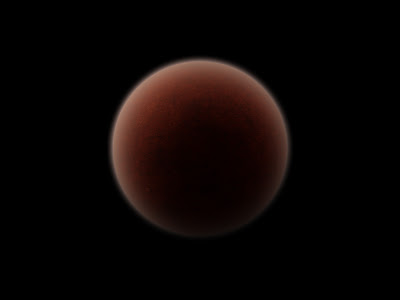
Planet
Ok so we are at a lovely stage with our stop motion animation "They Call Me Trinity", we are currently going through and editing bits, removing/adding things that aren't meant to be there, adjusting colours, applying film grains etc. Originally I had drawn an image from space to be an animated still at the start of the piece to help the audience suspend their disbelief and set the scene. However upon watching the finished animation this morning with plinky plonky piano music (silent movie style) I decided my planet drawing wasn't gonna cut it, for a start one drawn image at the start of a 3 and a half minute stopmotion animation would look a bit out of place. So I browsed the internet looking for the odd tutorial to help me make a planet in photoshop that would look the part. I found a very good tutorial on Deviant Art, and adapted it to the kind of colour scheme I felt would work, and here is the final image. Now just back to clone stamping sand for the 2300 remaining frames of the animation.......

Thursday, March 11, 2010
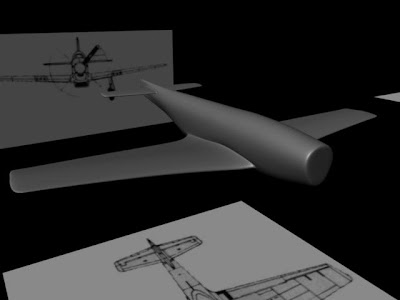
'Stang Continued


This is a continuation of the modeling task I started recently, after my minor hitch and going back over modeling I had previously done I have started to reach areas I hadn't done before, these renders contain the complete tailpiece, the modeling of the nose cone, remodeling of the base of the plane and inserting air vents, and in the final render the start of the cockpit. I am still in the process of modeling the cockpit hence why there is no real detail at the moment. Once I have finished modeling I would like to unwrap the UVs and texture the plane but one thing at a time for now.
Tuesday, March 9, 2010
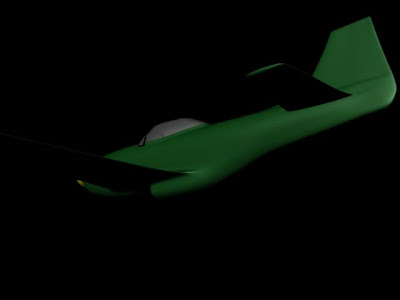
'Stang
Here is a work in progress of the P51 Mustang I am modeling to help hone my hard surface modeling skills. I had got a fair bit further than I have in this render, but then realised something was going wrong with my low res poly mesh. For some reason the edges were curving rather that being a very angular mesh. This was causing my sub div proxy to do all manner of weird things, I spent some time sifting through my history seeing if I could find the cause (I thought maybe I had some how smoothed my base mesh) but when I found nothing I deciding to go back through my previous saves until the mesh once again resembled what it was supposed to (as such both the tail extrusions needed to be done again). However this taught me some valuable lessons. Keep history until you are sure you don't need it any more (luckily I had, however in this case it wasn't very enlightening as to what I had done wrong) and save regularly that way if you make a mistake that can't be fixed by going through history then you can at least step back a few saves. On this note I might investigate and see if maya has an autosave function I can enable to help this situation and also potential computer crashes if I start doing something that actually challenges my computing power. Anyway for now enjoy my half finished plane:

Set Photos
Here are some photos of our set, lots of overlap with the pans around the set as they were taken at the same time. Followers of Richard Willock's animaton blog will notice cross over as we used one group camera for documenting behind the scenes tid bits. He got them up first so it will forever look like im copying them.


Set
This post is going to contain some videos we took that are simple pans around our saloon set showing off all the things we had made (props,characters and other set pieces, stuff we were generally rather excited about). We finished the entire set and upon consulting our tutor it was suggested that there wasnt enough attention payed to little detail. Our set was good but lacked really small finishes that made the scene. So we redoubled our efforts and started building tiny skirting boards, dirtying up wood surfaces, making metal characters less shiny and dry brushing like there was no tomorrow. The result was definately worth the work. The set really came to life and once a few final finishing touches were added we were ready to start filming.
Trinity Setup 1 from Richard Whillock on Vimeo.
Trinity Setup 2 from Richard Whillock on Vimeo.
Some Video References
Ok so its been a while since I last posted on my blog, I've been getting really caught up in the filming of my groups short "They Call Me Trinity" and havent been keeping up with posting all the behind the scenes photos/ videos of us animating, the reference videos we used to get a good performance from our characters and the images of the sets and props. This hopefully will be remedied this evening as I plan on going through and performing a bit of a blogging session to catch up. And also possibly some renders of where my current cgi modeling project is taking me. But anyway to video references, these videos have Richard, John and I performing quite a complicated wake up scene featured in the animation of the main character Trinity waking up after being dragged across the desert of a far off planet and arriving at his destination. We felt to give us the best possible chance of animating what we thought would be some complex shots we should each act out how we thought the scene should play out and use the videos combined with the animatic to base the animation on. We chose individual parts from each reference video and used them in the final animation.
Wake Up Toby from Richard Whillock on Vimeo.
Wake Up Jon from Richard Whillock on Vimeo.
Wake Up Rich from Richard Whillock on Vimeo.
Subscribe to:
Comments (Atom)