
Thursday, April 29, 2010
Scene Update (another one)
So having now finished my guitar and ran into some problems exporting it as an obj (obj doesnt like nurbs) I familiarised myself with the convert to polygons tool and exported the guitar. It doesnt look as nice in wireframe any more as now it is a mess of triangles, but o well it looks just fine in renderview. So i decided to pose the guitar in the scene and do a little update to show the last couple of changes I ve made to the scene. And without any more rambling here it is.
Finished Electric Guitar
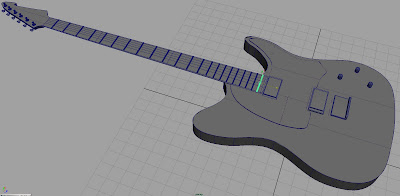
Right here it is the big moment, I ve finally finished modelling my electric guitar for my scene. As with the last time I'm using a wireframe screen shot rather than a quick render to show what I've done so far. You may notice that the guitar is missing some strings, this is because the entire object will be grouped when I export it into my scene as a obj. file. As a result of this I am going to add the strings in the scene so I can move them easily as they are most likely going to be animated during the animation.
In the end the model is a combination of nurbs surfaces construction from curves (the body, neck and headstock) and polygons (the frets, pickups and bridge) I also used nurbs curves and revolved them for the dials. At one point I looked at doing some fairly complicated stuff for some switches but thought that it was such small detail it didn't justify spending the time and probably wouldn't be noticed in the final animation so I shelved that idea. In the end I'm very pleased with the slightly simplified model but overall I think I ve managed to reproduce a lot of the detail off this guitar.
In the end the model is a combination of nurbs surfaces construction from curves (the body, neck and headstock) and polygons (the frets, pickups and bridge) I also used nurbs curves and revolved them for the dials. At one point I looked at doing some fairly complicated stuff for some switches but thought that it was such small detail it didn't justify spending the time and probably wouldn't be noticed in the final animation so I shelved that idea. In the end I'm very pleased with the slightly simplified model but overall I think I ve managed to reproduce a lot of the detail off this guitar.

Guitar Progress
I ve made some progress with my guitar model and here is another image of it during construction. Due to the nature of the nurbs curves I chose to print screen an image in wireframe so it is easier to see whats going as without any texuring a lot of the surfaces merge into one an other.


Wednesday, April 28, 2010
Guitar Modelling

I have been working on modelling a guitar for a little while now, and its been a slow start but today I finally managed to crack into it and now im starting to make some serious progress. Here is a render of the guitar as is. Its all at a very primative stage, although the body has the finished smoothness this is due to it being made of nurbs. The detail is mainly being made using polygons and requires some work doing. I also need to model the headstock, which could be an interesting task.
Scene Update

Ok so I've got a bit further with my scene, I have modelled from scratch a Kawai digital piano (I have one at home so coupled with some reference images I know it quite well). However the piano still needs a bit more work, ie some keys and detailing. I have also done a bit of kitbashing and dropped in a chair I have made before into the scene just to get an idea of what it will look like, I am going to rebuild the chair because I dont feel the style of chair will fit the scene I am going for. Also I am unable to just edit the chair I've already made so looks like I have some more modelling to do. I terms of modelling for the rest of the, I only have a little bit left to model, however modelling the guitar is going to be a challenge so I am going to allocate lots of time towards that. I may also model some more effects pedals, and then its just a case of covering the floor in cables (i am looking forward to this) and building my machines (once I have designed them)
Domino Effect Animation
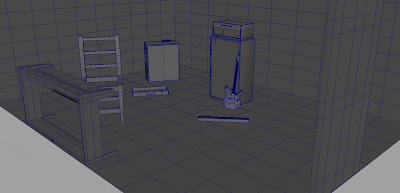
So as our introduction to CG animation tasked, we have been told to make an animation based on the idea of the domino effect that is 30-60 seconds long. We had to pick a theme early this week to decide what are animation is basically going to be. Now it took me some time get to get an idea of the kind of thing I wanted in my animation but I think I have finally cracked it. I decided I wanted the animation to be something to do with music after I spent some time modeling a guitar amp stack on monday. From this I chose that the setting of my animation would be a music practise room, and that the theme would be music. Armed with this I went around modelling some more essential parts of my scene, here is a render (I havent started texturing yet hence the excessive amount of 50% gray) but here are some of the meshes I have already made.

There are plenty more items on my modelling list: a digital piano, chair, guitar and possibly a bass guitar, and I think a drum machine a whole kit might be a bit much. Now the theme is the domino effect and I've decided that the way im going to animate the things in my scene is my designing and people lots of fantasitical contraption (think Wallace & Gromit cracking contraptions) that in a domino effect will start building a song up. This way I will also get a good idea that requires sound to work, so hopefully I won't just forget about it which I might have done if the project wasnt so sound oriented.

There are plenty more items on my modelling list: a digital piano, chair, guitar and possibly a bass guitar, and I think a drum machine a whole kit might be a bit much. Now the theme is the domino effect and I've decided that the way im going to animate the things in my scene is my designing and people lots of fantasitical contraption (think Wallace & Gromit cracking contraptions) that in a domino effect will start building a song up. This way I will also get a good idea that requires sound to work, so hopefully I won't just forget about it which I might have done if the project wasnt so sound oriented.
Sunday, April 25, 2010
Mustang Texturing Continued
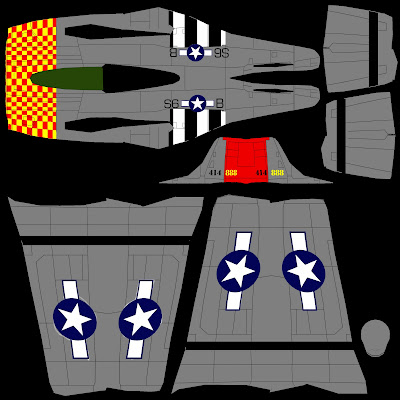
So at the moment I am still working towards texturing by P51 Mustang. In my last post I showed roughly where I had managed to work my way up to, a photoshop file with all the basic colour, decals etc for the mustang. However it was a fairly long way from finished. Currently I am distressing the colour texture map that I had made by the end of the last post. This has involved making all the individual panels look like they are made out of metal, creating rivets (which has been riveting) and adding some scratch wear and tear detail. So here is the colour image with these changes. Currently I am only working on the metal so the layers with paint and decals have been unchanged hence why they are starting to look particularly pristine.


Thursday, April 22, 2010
Texturing P-51 Mustang
At the moment I am texturing/learning how to texture the P51 Mustange Model that I made. I've been using projections and 3D textures in maya to add detail to the model such as decals, checker pattern, and stripes. These projections have then been baked onto the fuslage's UVs and baked out as a tiff texture that I can then open up in photoshop and layer on top of each other. Then it becomes a case of using what ever tools I feel comfortable using to delete all but the neccessary areas of each texture until only the bits I want are layered on top of each other. This is how I have made the basic diffuse colour texture for the model. I also kept seperate the texture I made of the planes panel detail so I could use it as a bump map. Now that I have finished the colour texture, and once I am satisfied and have finished tweaking it at this stage, I will once again re open it in Photoshop to start distressing the texture and adding life like detail. I will also open up UV snap shots of the planes detailing and paint details onto them before returning back to Maya to apply the diffuse and bump textures. Then the final step will be to use those existing textures to make a specular map for the different components of the plane. Then the texturing will be finished.
Here is the detail image I made in photoshop, this adds panel definition to the model and is also used as a bump map to add depth in the cracks in between metal panels.
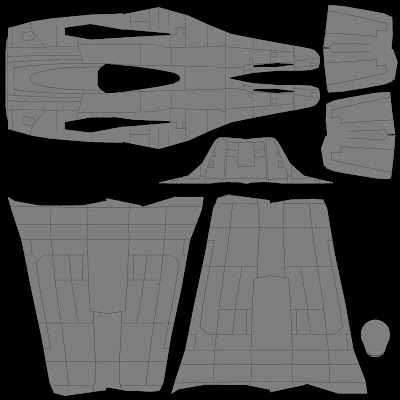
Here is the colour map for the mustang prior to any texture distressing. I'll post a quick render of the fuselage with the maps applied.
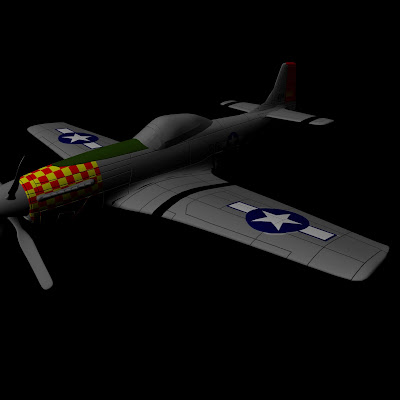
Final Render of the Mustang with a smooth on the model and with bump and colour maps applied. There is a slight problem with the texture where the wing joins the body when the smooth is applied but this will be one of the areas I will need to work into when I go back into photoshop to start distressing the texture.

Texturing P-51 Mustang
At the moment I am texturing/learning how to texture the P51 Mustange Model that I made. I've been using projections and 3D textures in maya to add detail to the model such as decals, checker pattern, and stripes. These projections have then been baked onto the fuslage's UVs and baked out as a tiff texture that I can then open up in photoshop and layer on top of each other. Then it becomes a case of using what ever tools I feel comfortable using to delete all but the neccessary areas of each texture until only the bits I want are layered on top of each other. This is how I have made the basic diffuse colour texture for the model. I also kept seperate the texture I made of the planes panel detail so I could use it as a bump map. Now that I have finished the colour texture, and once I am satisfied and have finished tweaking it at this stage, I will once again re open it in Photoshop to start distressing the texture and adding life like detail. I will also open up UV snap shots of the planes detailing and paint details onto them before returning back to Maya to apply the diffuse and bump textures. Then the final step will be to use those existing textures to make a specular map for the different components of the plane. Then the texturing will be finished.
Here is the detail image I made in photoshop, this adds panel definition to the model and is also used as a bump map to add depth in the cracks in between metal panels.
Here is the detail image I made in photoshop, this adds panel definition to the model and is also used as a bump map to add depth in the cracks in between metal panels.
Tuesday, April 20, 2010
Iced Donut
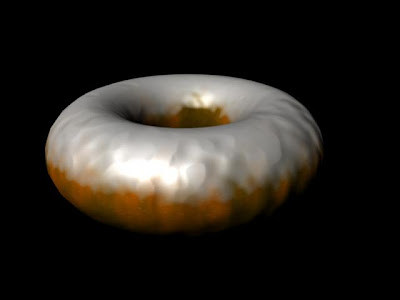
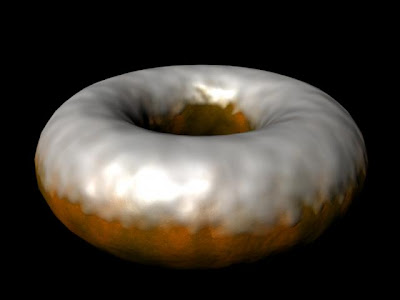
I've chosen to spend a bit more time on the scene and have been looking up how to bake textures to am object. This allowed me to create and new torus shape and assign a simplified version of the shader network of procedural textures I have on my first donut but simply as three texture images, a diffuse texture, a bump map, and a specular highlights map. I am now going to post a render of my new donut compared to the donut from the procedural texturing render and compare to see if anything has changed in the process of baking or whether I simply have the same textures combined as a series of maps. The top image is my donut with the textures baked on and the lower image is the donut with the huge shader network of procedural textures. The only difference I can make out is a slight decrease in bump value on the upper image but that is because I lowered the bump amount from 1 to 0.15 when I imported the bump as it started out too high so I lowered it to the usual amount, I think I will go back within the scene and play around with the bump value until it matches the original donut. All in all this experiment has been a success I can now deform my donut and duplicate to create a composition easily.


Iced Donut
This morning I have been delving further into the world of texturing, this time looking at 3D procedural textures. Procedural textures and textures made within maya using mathematical algorithems. When I first learned to textures (on my fruitbowl and banana) that was also made with procedural textures, the difference being that they were 2D procedural textures. 3D procedural textures are applied using a process known as projection. The reason for this is that not all surfaces can be easily UV mapped to create nice 2D images to texture in photoshop. Lots of organic models for instance can have areas that arean't simple to unwrap. This is when a projection can be used to project a texture straight onto the model bypassing UVs. However the downside to using procedural textures is that they often look computer generated and a bit artificial. So often you still have to make a texture but instead of mapping it too the UVs project it too the model instead. Here is my Iced Donut in a stage near completion. The only things I would like to do to the model is to bake the procedural texture to the model (this allows me to move and deform the model without the texture being altered) and then apply an animation lattice to allow me to create natural looking deformations to the donut. The I would duplicate the model and create a composition and light the scene.

Sunday, April 18, 2010
Texturing Walls Graffiti
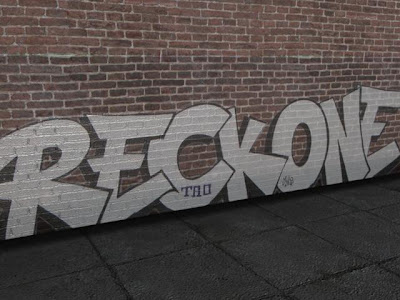
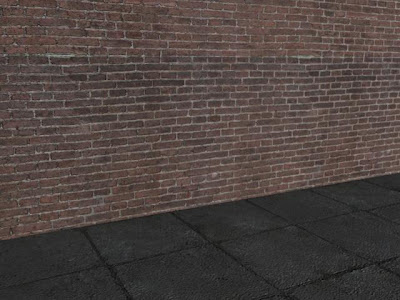
Here is the finished render of my street wall. I have mapped a piece of graffiti onto the wall. To do this i used a layered shader and the alpha channel I made in photoshop to tell maya which bits of the graffiti layer should be transparant and which shouldnt so that the colour attribute would be on top of the wall. Then I mapped the same bump map from the wall onto the graffiti so that bump detail from the wall is visible through the graffiti. I also used the graffiti image to create a specular map for the wall, keeping the silver spray paint with larger specular highlights and the dull brick wall with only a few. I then used a layered texture to add a colour ramp to the wall and pavement so it gets darker where the two surfaces meet. No new lighting has been added so its just a simple directional spot light which I havent changed any of the settings on.

Saturday, April 17, 2010
Texturing Walls Bump Map
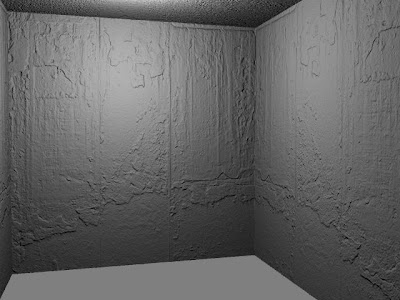
Here is my latest render of the walls and pavement shot through a render cam with one directional light pointing at it. Current I have mapped a diffuse (colour map) and a bump map to each surface. The bump maps purpose is to give surface detail to the geometry that would require many polygons to describe whereas the actual geometry in the scene is only 2 polygons. This demonstrates how good texturing helps you be economical with your modelling.

Texturing Walls


Ive been spending some more time learning about texturing, in particular the tools and methods that you use in photoshop to create textures which are then applied in maya. In my last texturing tutorial i learnt how to use pre-made textures (something i ve done a bit of) to get an idea and understanding of how you use hypershade networks and how different kinds of textures work (bump, diffuse, specular etc). Now im working through some exercises but making my own textures using photoshop. At the moment I'm creating a wall scene, which features a brick wall and pavement section. I downloaded some photos from free texture websites and used photoshop to alter the perspective on them before making them into tiles (meaning I can repeat the texture in maya without a seam showing) Then I imported them into maya and applied them to polygonal planes. Here are the finised diffuse textures and a quick render of the wall and pavement. I will be making bump map textures from the diffuse textures and applying those next.
Unfortunately i cant upload the textures right now as they are saved as tif's for maya use when i get round to it ill convert them to jpegs and upload them.
Sunday, April 4, 2010


House Texturing
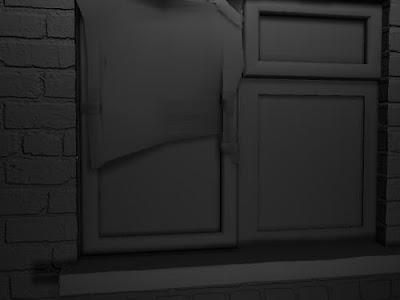
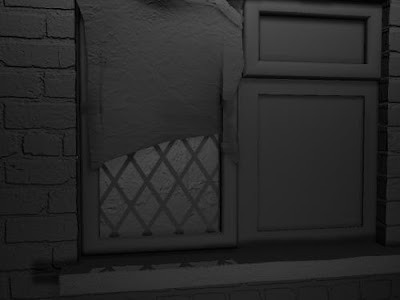
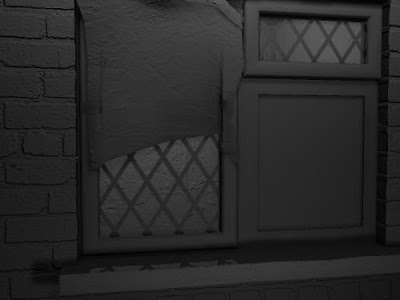
I've spent quite a bit of time this morning learning bout different textures (I've been using Blinns, and phongs) and how to use them to make this scene look realistic. Instead of starting with diffuse colour as the first texture I went through adding bump maps to all the geometry in the scene. As you will see from the renders this made a surprising amount of difference to to gray geometry and really highlighted how textures such as specularity, bump and alpha and probably more important than the diffuse texture. I have also animationed a little camera pan across the scene which will hopefully help show off specularity and reflections in the windows better. This will be posted up shortly. Thats all really apart from texturings wicked, love it. Also there will be another post after this one with the rest of my work in progress renders.


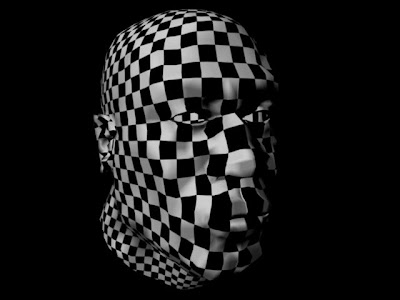
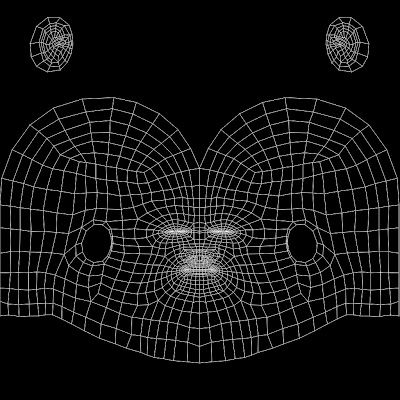
Organic UV mapping
A little while back I was busy working through some tutorials to build me and plane, and from there unwrap sed plane so I could learn how to UV map non organic meshes. Well Ive just finished unwrapping a nice organic mesh for a human head. The mesh wasn't made by me (I do plan on doing the tutorial which teaches good practise when it comes to edge loop topology which after practising skinning a mesh I am really starting to appreciate.) But anyway here is the UV layout for the mesh of the head. Weirdly I think I found it easier to UV map organic meshes that the mesh for my P51 Mustang. Coming soon hopefully I ll start to post Zbrush work on here once my wacom arrives and I can get my claws into that. Im looking forward to Zbrush's UV master doing all my UV layouts then.


Subscribe to:
Comments (Atom)