
Friday, May 28, 2010
Screenshot_Storyboard
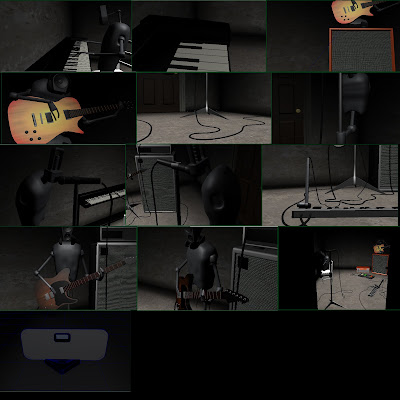
The last piece of work for the photoshop lectures portion of this term. This is a storyboard of sorts made up of screenshots from within maya of all my models with their textures.
Tuesday, May 25, 2010
Digital Sculpting
I have officially started my zbrush practise. Heres something I knocked together this morning. Started with a very low polygon sphere gradually adding more divisions, blocked shapes out first then go into higher levels of detail as the number of polys increase.


Monday, May 24, 2010
Global Illumination
Here is a quick camera move animation of the camera going down the scene from my global illumination exercise. It gives you a chance to see some of the colour bleeding and ambient lighting in better detail. I felt overall It had quite a mirrors edge feel.
Global Illumination from Toby Rutter on Vimeo.
Sunday, May 23, 2010

As part of the few remaining escape studios lessons I have left to do there are two tutorials one letting me pull all my hard surface modelling and texturing into one final composition to create a great looking render. The other uses the nurbs kettle model I designed earlier on and shows me how to render it so I can match realistic lighting and use photoshop to composite it into a real life photo. But first things first I thought I would do the tutorial I had no previous experience of. This is the one using photons and caustics. These renders just use lightings emiting photons to create really ambient feeling lights using mental ray.
 This is the stream of photons bouncing around the scene giving the very ambient lighting feel, which is incredibly different to my first render which just uses the lights I built with raytrace shadows as opposed to emit particles. In the next render I start to change the colour of the photon lights which starts to cause the colour bleed effect you can see here. After I am happy with the colours I am going to start texturing the scene which will have a bit impact of what the photons do and the overall appearance.
 With different textures applied the scene looks like this, I have also increased the number of photons per light to one hundred thousand which gives you great tones of colour but unfortunately causes the very patchy effect. To combat this I am going to use final gather which boosts the rendering time significantly but will smooth out the colour.
 Here is an example of the render after final gather, colours have smoothed out a lot, only issue is that final gather does often darken your scene a lot. So for now I am going to keep playing with the intensity of the lights and find a good render result. Then I will cache the final gather and photon mapping so that mental ray doesnt need to keep working it out each frame so I can batch render off my animation.
Thursday, May 20, 2010
Raytracing and Depth of Field
I have been learning a bit about mental ray and glass. During the domino effect project I know a lot of people spent some time trying to create the best looking glass effect. So far here is the best way of doing it. This render is done using mental ray (although surprisingly the render time was not too high and with the method I used you can be fairly flexible and trade small details for faster render quite easily). The beauty of the method for making glass I was using is it just uses blinns and phongs, no antisoptic materials or mia materials. It just becomes a case of altering the eccentricity to achieve the correct shape of highlights and using transparant colour to make the material transparant in a realistic way rather than just turning opaque. Then once you turn on raytracing and raytrace shadows you can start to adjust refractions when light is travelling through glass. Finally I used the hypershade to create something known as the fresnal effect within my glass and water giving even more realistic reflections and refractions.
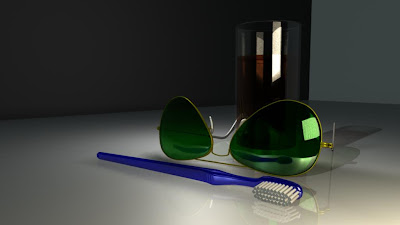
Between these two renders I was making the floor a glossy surface so I had to spend some time trying to make the reflection appear in the floor but to be sharper closer to the object and blur further away, but without just being a poor qualitly.
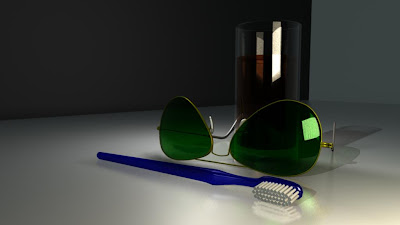
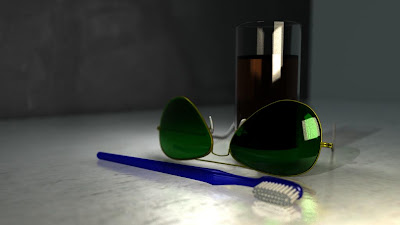 Finally I added textures (colour, bump and specular to the floor) and just colour to the feature wall. Then it was time to add one of the biggest realism factors of all (although it adds a fair bit to rendering time it was well worth it). I am of course talking about the depth of field on the camera, I used a locator and set it on the front corner of the glasses cause the image to go out of focus slowly from that point onwards.
Tuesday, May 18, 2010
Painting with Lights
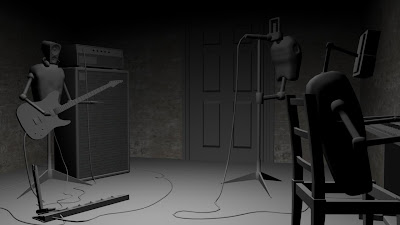
Whilst I was working on my domino effect animation I felt I needed to improve my knowlegde of lighting and thus I started work on the lighting and rendering section of the escape studios lessons. These are the last lessons I have left to do before I have completed all of there tutorials which feels like a big deal for me. But anyhow I was given this scene and tasked with lighting it and I really like the result, admittedly the textures do a lot of the work, and I am a firm believer that would can do such a lot with textures that lighting should always be the final thing you turn to, to give the piece that finished qualitly. But without further ago heres a quick camera reveal of the scene being lit.
Sunday, May 16, 2010


Introduction to photoshop work
This term along side maya we have had some lectures covering photoshop basics, some of the techniques learned are then intended to support the work we are doing on our maya projects.
This is a montage of various images of objects that would be appearing in my animation. This was part of our first lecture covering selection tools.

These images are textures I used in the final animation, we learnt how to create tileble textures so they could be repeated without seems. There are more in the next post but I could only upload so many at a time.


Saturday, May 15, 2010
A few references
Here are a few reference videos I used when animating.
Muse: New Born Live Wembley stadium
http://www.youtube.com/watch?v=2jKa_0xnTfU&feature=related
this is the song I was animating to and I used to live version as the soundtrack, so this video of the band live helped with some influences and also as a reference when animating.
this is a video of a bass cover, I used lots of videos of people covering the song as a way of getting a better look at the different instruments parts. Although I already knew the guitar and a bit of the piano.
Preview Animation
So here it is the preview test for my final animation. This is made completely of playblast footage from within maya (hence the quality) and unfortunately it is edited together rather choppy-ly due to having to use windows movie maker as uni is closed for the weekend (no final cut pro and adobe premier) that will all be rectified for the final edit of the render. Other points to note there seems to be a problem with the playblast footage around the time the fx cuts in prior to the guitar riff, the camera should be panning across the pedal at this point. But all in all I am rather pleased with how its gone so far. The characters are a little bit static still, although they are moving a lot more now than in previous test animations. The animating has been probably the hardest bit in my opinion, I prefer and feel I am better with the modelling stages and although I havent yet completed texturing thats again another step I really enjoy. Also due to the nature of my characters animating them to act in the same way as realy performers was always going to be difficult, I had to use joint skeletons in the arms and fingers to get the amount of movement you see here, and any more would have required different kinds of contraints, locators, actually painting weights to the meshs. All things that I am starting to get an understanding of but no where near enough to apply them to an idea and creation of my own yet. Its been tough knowing when to attempt more and when to accept things and leave them with this project. I want to make something that ressembles a complete animation as much as possible, and I picked something hard to do to challenge myself as I wanted to test what I have learned over the last 5 months, but I feel the animation is now, perhaps with a few tweaks, at a near finished state as I want to concentrate on trying to texture the remaining bits of my scene to get that finished feel.
Thursday, May 13, 2010
Playblast Continued
Here is another playblast from camera 2's perspective. This time I've done a bit of animation on the bassist's fretting hand. Its a very basic animation, like the other bits of animation I created a small clip and used trax to repeat the clip over for the shot. I can't yet decide what level of realism I am going to animate the playing of the instruments to. For now I am going to leave the shots like this with simple camera and character animation. Enjoy
A Few Playblasts
Here are a few tests I've done of little bits of animation within my final animation. Enjoy.
Camera 1 test from Toby Rutter on Vimeo.
Camera 2 test from Toby Rutter on Vimeo.
Video References
During the character performance and believablilty topic I didn't record enough of my references, a mistake that I was't going to continue into Introduction to Digital. The first influences are quite typical "Rude Goldberg" machines influences of the domino effect, and later on they become more themed towards music and my particular animation.
First up is the Honda Accord advert, called Cog. This is one of my favourite adverts ever and is a perfect example of brilliant domino effect in action.
Next up is Wallace and Gromit's Cracking Contraptions, this is the first of two stop motion influences for this CGI project, sadly embeding is disabled to I have had to settle with a link. I really love Wallace's incredible and weird machines that often involve lots of small actions working towards completing a simple task. And have just started brainstorming ideas for the domino effect cracking contraptions was a good place to start.
http://www.youtube.com/watch?v=SuHUS-9laBI
I fairly soon realised I wanted to do an animation involving musical equipment, although I spent some time working how I would use the domino effect within that. I decided I would do a bit more of a conceptual domino effect rather than a literal one. By this I decided to animate to music and how the music building up and more instruments being added to be the domino effect. It was at this time that I became aware of Animusic, a series of amazing animations that are based around entirely the same idea.
Starship Groove was getting even closer to the kind of animation I wanted to make, I had already decided that I wanted to have machines and robots that I would design playing the instruments.
finally we have a bit of a weird influence, this is the second stop motion animation that has influenced me. It is a music video by a metal band call Austrian Death Machine (apartly influence by Arnie) and the song is called "get to the choppa". The music video is rather good it involves a stop motion robot band playing the song. Seeing as it drew parallels with what I was doing this thought I should get it in.
Tuesday, May 11, 2010
Guitar Animation Test
I have started to animate! This is a very cautious an slow process, first i rigged the right arm of my model and tried some quick test strumming and then the left arm to add some fretting action to the animation. I'm trying to keep this simple to make everything do-able at this stage. But if I decide I like the look of this section of animation it will become a clip to be used as part of the overall guitar part. I like using clips in animation because it allows me to easily re-use the bits of animation in different orders whilst preserving the original. I am quite pleased with this and i hope I can animate the rest of my animation with relative ease. I need to go back into maya and have a look at the play speed because this is running faster than it should.
Scene Render Basic Textures
Here is a render of my scene so far, I've established basic lighting and started to texture walls. I could do with using three point lighting to lift the shadows up a bit, but I like having the scene darker towards the top of the room. I am about to start creating joint skeletons for the arms of the characters and also heads/necks so i cant begin to animate them. I also need to set the camera up in the scene.

Sunday, May 9, 2010
Organic Modelling Practise
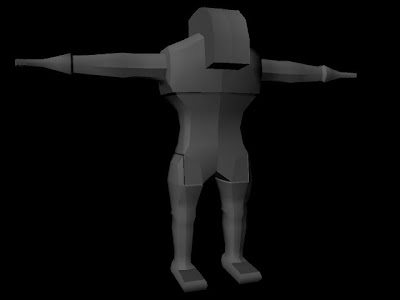
I felt I needed a break this afternoon, and being who I am chose to take a break from maya by doing more on maya, only this time I decided to work on something outside of the domino effect project. And seeing as I would like to go into building characters and environments I felt I was due some much needed modelling practise. So what started as lets see how far I can get into modelling a biped character very soon has turned into some ideas for a character. The model is at quite a early stage, I'm still blocking out and adding detail. The idea behind the character is an aquatic fish like alien that lives in a mechanical suit to allow it to move out side of the water. The kind of imagery I associate with it at the moment is a bit like Admiral Ackbar (only in a enclosed helmet and a smaller fish creature controlling an exo skeleton) and suit wise the kind of armour the krogans where in Mass Effect, are a few of my influences. I'm going to keep working on it as far as I can get and then when it gets to a point when I am happy with it or I get really stuck I am going to restart the model and try and build it again as this helps to improve the model and your workflow.
The model in lowest resolution before the mirror geometry
Higher resolution with mirror
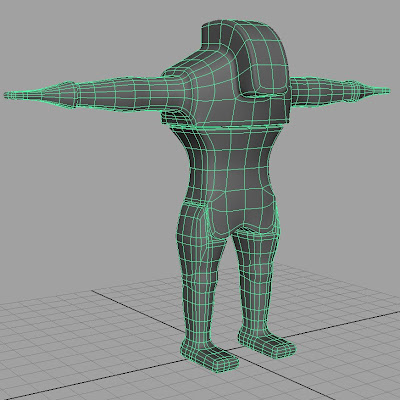
Highest resolution but a screen shot in maya rather than a render, this allows you to see the wireframe and get an idea of further modelling.
The model in lowest resolution before the mirror geometry

Higher resolution with mirror

Highest resolution but a screen shot in maya rather than a render, this allows you to see the wireframe and get an idea of further modelling.

Meet the Band
I am currently nearing the completetion of all the modelling required for my domino effect animation. The room has all its details (no textures or lighting yet, this will be explained), all this leaves left to do is to finish building and adding details to my characters. So without further a do I'll let you meet the band
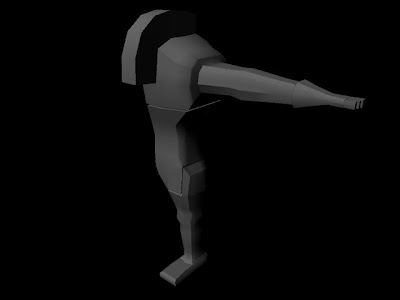
Bassist
the head is modelled based on big bass speakers, the pair of headphones I previously modelled but I liked the look it gave the character. The speaker he is sat on is modelled from reference images of an Orange speaker cabinet. The amp is a duplicate of the ampeg header I made for the guitarists stack. The bass is modelled from reference images of a gibson les paul copy, both from images and also first hand as its one of my own guitars. Areas that are going to be worked in on, the hands obviously need to be made, the arms need work and the lower section of his body needs to be built so he has something that is actually sat on the amp as opposed to hovering. Also the upper torso needs a little tweaking.
Singer
The vocals of the band are handled by this fella, the head is the key part of the model, it is based on a retro microphone (this was the first design I had for any of the band and so was fairly key in influencing how I made the bassist) again the body needs some work, the singer isnt intended to have any arms just the limb holding him to the mic stand. If I get time once I have modelled everything in a preliminary stage I would like to go back and spend more time modelling bodies and making them more individual rather than just duplication and some scaling to make them different.
Bassist
the head is modelled based on big bass speakers, the pair of headphones I previously modelled but I liked the look it gave the character. The speaker he is sat on is modelled from reference images of an Orange speaker cabinet. The amp is a duplicate of the ampeg header I made for the guitarists stack. The bass is modelled from reference images of a gibson les paul copy, both from images and also first hand as its one of my own guitars. Areas that are going to be worked in on, the hands obviously need to be made, the arms need work and the lower section of his body needs to be built so he has something that is actually sat on the amp as opposed to hovering. Also the upper torso needs a little tweaking.

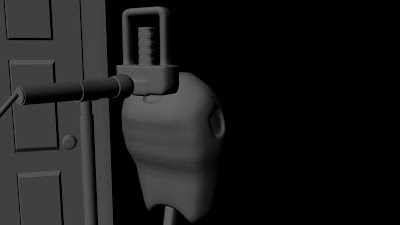
Singer
The vocals of the band are handled by this fella, the head is the key part of the model, it is based on a retro microphone (this was the first design I had for any of the band and so was fairly key in influencing how I made the bassist) again the body needs some work, the singer isnt intended to have any arms just the limb holding him to the mic stand. If I get time once I have modelled everything in a preliminary stage I would like to go back and spend more time modelling bodies and making them more individual rather than just duplication and some scaling to make them different.

Thursday, May 6, 2010
Playing with Constraints
It's been a while since I worked through anymore escape studios lessons, and eager to keep learning more shiny new things in maya I decided I would spend some time learning animation techniques (seeing as at some point soon I am going to have an animation to hand in). So I approached where I had left off a lesson about constraints. The result of this little lesson is the playblast you see below of a rather snazy digger model moving and picking up a crate (the joys of constraints). Apologies for the low quality of the movie (I will render out an image sequence at some point). Anyhow this is my first step into the world of rigging and incredibly important part of the animation process, hopefully not too much will be needed for my rather ambitious domino effect animation.
Wednesday, May 5, 2010
A Few small additions to the Scene
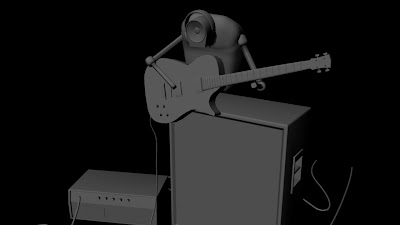
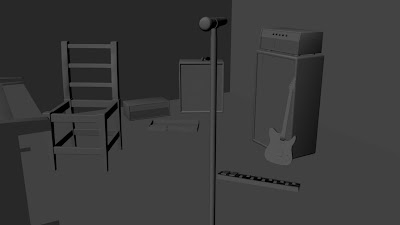
Ok so I realise I am posting a lot of renders of my scene as work in progress I promise after this one I ll only post them when I have actually added loads more to the scene. In this render you can see pretty much all the elements in my scene so far (new additions include mic stand, and also a dupplication of the amp to make a bass amp header. The next step is to finish making bass guitars, and building some snazy cables and possibly the odd foot pedal and them I am ready to build the characters of the animation (probably going to be my toughest task.) It is nice to actually render of an image of the scene rather than just another print screen this render is taken at HD 720 with has been decided as the resolution size for all our animation.

Subscribe to:
Posts (Atom)