Monday, October 31, 2011

Male Face Sculpt

As I've been getting into the swing of things I've been doing more drawing (as well as reading) which will eventually get scanned and uploaded to this blog. I decided that it was time to do another head sculpting session to see how my understanding of the face was coming along since the sculpt I did a few weeks ago.

I began this sculpt in the same way as I previous ones with a simple sphere which I pushed and pulled into shape. The best thing about zbrush is being able to hop up and down subdivision levels, creating big details at low levels and fine details higher up. The advantage of this also is I can drop down and carve things back and rebuild which happen multiple times across this sculpt. I still find it tricky to place eyes correctly and sculpt the eye socket, I found it much easier carving out the skulls eye sockets placing the eye balls and then building up the muscles surrounding the eye. In the early stages I wasn't using any subdivision levels just dynamesh to retopo the mesh as I pulled out new areas. However it came to a point when I would need to do a structured retopo of the model to give better resolution in the areas such as the eyes and mouth. So I used polypaint to plan out my topology over the model and then used the retopo tools.


The new base mesh was much more efficient and would deform well if animated due to good resolution in areas of deformation and careful places of poles to avoid nasty deformation. The theory being once I had finished my high detailed mesh I could directly export one of the retopo low sub division levels which would make a good low res mesh without any additional work. So I began working up various details, dropping back down to tweak the shape of the face and the position of the features. Once things were starting to get more complete I created a quick piece of place holder hair geometry. Often it can be hard to look a face and see what is wrong with it when it had no hair.


I am reasonably happy with the improvement in this sculpt. The mouth and lips are still a weaker region for me, the eyes are a major improvement but I still haven't got to the stage in my understanding of the human face that I can just pull them of a sphere, I have to build up the bony landmarks of the skull first and go from there. Apparently my understanding of the forms of the skull are much better. Having spent some time examining, drawing and sculpting both I feel the male face is much easier. Creating accurate female faces is tricky as you have use details in a much more subtle way, and as a result are constantly trying to balance a featureless face with one that looks aged due to over use of lines. The male face doesn't seem to age with the addition of certain lines in the way the female face does.

Thursday, October 20, 2011

Concept

There was no avoiding it, eventually I would have to stop drawing/sculpting monsters and ugly things and actually start working my way up to creating realistic humans, which are really the hardest thing you can draw, nothing is as scrutinised as the human face, we see them nearly every minute of everyday (unless your a touch on the agoraphobic side) and even if artistically we can't tell you what is wrong with a face we know when something is (more on the uncanny valley later). Any hoo for my L6 Specialist Study 1 I shall be doing a lot of research/drawing/sculpting to really bone up on my understanding of the human face and its expressions. I will for my final piece be submitting a game character head which will hopefully have benefitted from my research and be to a very high quality. So to kick things of here is a digital paint over I did on top the base proportions for the head from zbrush. The character I will be modelling is female (but also bald, which is a bit weird but thats the brief). In the interest of keeps things short this image shows a number of apparant areas for me to concentrate on: eyes, they are expressive and tricky to get right but particularly the the dimensionality of the eye socket; lips; and the eye brows, as you can see from this list basically any part of the face used to convery expression. Looking at this drawing the character looks very melancholy which seems to be an expression I was made to draw. I need to understand how moving certain facial features affect the perceived expression so I can use them correctly.

Saturday, October 15, 2011

Overdue Update

This blog is due an update me thinks, although this post is going to follow a similar vein to my last. Last night I decided to have a break from work and just mess around in zbrush and see what came out. I'm rather pleased as so far I've managed to spend a fair few hours in zbrush which is my resolution for this academic year. This sculpt was done in an hour and a half and I'm quite impressed with what I've managed to get done in the time. One area I'm looking at improving in my modelling is my ability to come up with interesting hard surface designs, on things like armour etc, at present this is probably the biggest time sink in my modelling. Anyway there isn't much more to say about this and I'm trying to keep the posts short so enjoy.

Monday, September 19, 2011

Zbrush Doodling

It's been an age since I updated this blog, which I do slightly regret, however I haven't been doing a lot of work I can post up here recently, hopefully in a few years some I'll be able to show the work I've been doing but we'll see.

Anyway over the weekend whilst taken a break from some "serious" zbrush work I just start doodling in 3D using a sphere as a base mesh, and pretty quickly I can up with some shapes that I thought were cool and kept working into the sculpt. A few hours promptly disappeared (I think I've spent about 3 hours on this so far). I rather like this piece visually, I looks like some sort of slightly abstract tiger based god or a mask in his likeness. I like the idea of potentially turning it into a final fantasy style eidolean. I'm at a stage now when I just need to go across the rest of the model and smooth things out and add any tertiary detail, I think I'm going to add lots of patterns carved into the surface. Then I may do a retopo so that the topology is a bit more specific for it that just a sphere base.

I will definitely knock out a low res and texture it to pop into my portfolio, and hopefully I'll get a bit of time to construct the rest of the character.

Monday, August 1, 2011

Character Modelling

The few blog uploads of Gamer Camp work seem to have got me back into the mood for blogging and seeing as I started modelling something which I hope to be a portfolio piece this morning this feels like a good time to post some stuff. First of all, resolutions for future work 1) finish them 2) spend as much time in zbrush as physically possible, I'm reaching a bit of a plateau with my Maya knowledge at the moment I don't know everything but I know enough that as long as I keep using it I'm not going to run into any problems of "o crap how do I do this" so now I want to make sure I'm spending plenty of quality hours in zbrush.

Anyway intro over onto the work. The last piece of zbrush work I did was something I quite liked, definitely as a concept, but due to other commitments the project got really drawn out to the point where I could only see what was wrong with it, and just wanted to move on and use what I had learnt to start something new. Also going with a humanoid character barely lots of flesh is always a tough challenge because anyone can tell if anatomy is off even if they can't tell you why.
Anyhoo digressing again.

Here is a quick sketch I knocked up, the basis for the character is that he is going to be a corporate espionage/spy/hacker person who is infiltrating an order of monks who keep documents and information guarded from the outside world. I started by knocking out a rough and ready base mesh from maya, but all the leg work has been done in zbrush. This is definitely how I prefer it, it makes the whole process way for artistic. The idea is once I have the human body finished I will model clothes around it, I have gone to higher levels of detail than I need to for the body seeing as it will be covered, but it's a valuable practise exercise. The model looks a bout a billion times better than my previous, its way for anatomically correct and the subject matter isn't someone on roids which I always prefer. I feel like I'm getting the subtle anatomical details down much better this time around. The hands feet and face are still pretty underdeveloped, a lot of time will be spent on the face as its going to be a focal point of the model. I will keep posting updates as the work progresses.


Saturday, July 30, 2011

Screen shots from They Came From The Deep

These images are all taken directly out of the game, most being screen grabbed straight from the device we were testing/playing the game on at the time.


If you look very closely at the coin when playing the game, you can see the Gamer Camp Course Director Oliver Williams' face embossed upon it. We felt this was suitable thanks for all he did during the course.


This is one of my favourite screenshots, it was actually of a bug we encountered where the game was loading our HD assets for retina display onto a none retina screen, as a result the mermen appeared huge. Thankfully like most of our bugs it was solved just by finding the file name someone had spelt wrong when loading the asset. We discovered that iPhone simulator isn't very case sensitive but as soon as you start running on the device, one lower case letter and you'll run into problems.


Our Games main menu screen, artistic credit goes to Jenny Medlock, for putting this together in a very small amount of time, but at the same time totally capture the feel of the game.

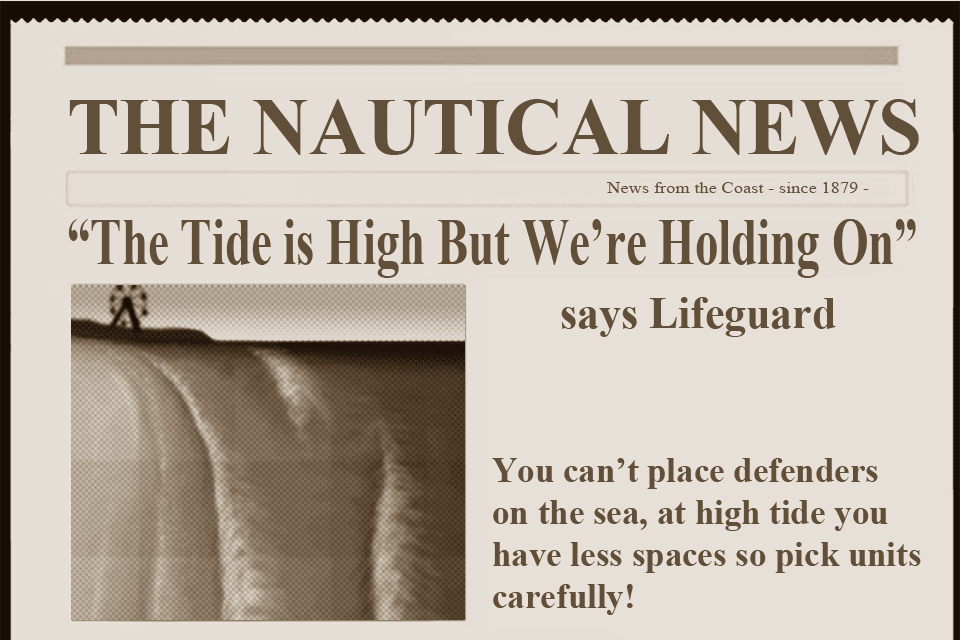
Hot Off The Press

In between levels of the game we chose to use newspapers to explain the progression of the game, and help tell the games story. The style really fitted with the alternative 1950' B-movie style of the game. One of our biggest achievements was managing to really capture the feeling of the brief we were given and have an extremely coherent style in the final product.